Enjoy! Because life is too short to deprive the palate!
Showing posts with label Fish. Show all posts

9.19.2010

Brown-Sugar Baked Salmon over Steamed Rice with a Feta & Cranberry Salad


As a child, growing up in a land-locked state with little opportunity for fresh-caught fish, I highly anticipated the arrival of one of my dad's good friend's, "Jerry The Fisherman." Jerry would arrive straight off a flight from Alaska, bearing fresh-caught filets of the highest quality Wild Alaskan Salmon. My father would immediately fire up the smoker and together Jerry and my dad would serve us all up a feast of brown sugar bbq'd goodness- the perfect combination of tangy and sweet. In my awkward anti-fish days this was the only seafood I felt fit to indulge in; thank goodness my taste buds have since matured to include all facets of the underwater world, but the memory of these meals has inspired my cooking of salmon ever since. 

This meal is a great addition to any home-cook's arsenal, as the flavors are rich enough to compliment both fresh or frozen fish. If you can't get fresh fish, the flash-frozen filets from Trader Joe's store nicely and can be quickly defrosted and effortlessly prepped for a gourmet-feel that will impress any dinner audience. You can easily adjust the quantities to incorporate an intimate dinner for two or up the ounces on the filets and have an entire family feast. 

Brown Sugar Baked Salmon
  • 2, Wild Alaskan Salmon Filets, fresh or defrosted, any size, deboned with skin on bottom
  • 2 tsp Herbes de Provence, divided
  • 6 cloves Garlic, thinly sliced
  • 1/4 cup Brown Sugar, divided
  • 2 Tbsp Honey, divided
  • 1 tsp Cayenne, divided
  • 2 Tbsp Low-Sodium Soy Sauce, divided
  • 1/2 Lemon, thinly sliced
  • 1 Tbsp Butter, sliced and quartered into 4 small pats
  • Fresh Cracked Black Pepper
  • Himalayan Pink Crystal Salt (Check out the health benefits vs. regular salt!)
*Preheat your oven to 400 degrees. Line a glass baking dish with tin foil and set aside. Wash your fish filets with warm water and set into the pan. With the tip of the knife cut small slices, over the top and sides of each filet, tucking the garlic pieces into each slice. 

*Next, pour 1 Tbsp of Soy Sauce over each piece, and then rub the salmon with the Herbes de Provence, and approximately 1/2 tsp of cayenne, per filet. Next, coat each piece with a generous amount of brown sugar, patting it into the salmon. Drizzle with honey. For optimal flavor allow the fish to marinate in the refrigerator for at least 30 minutes. If you don't have the time, don't worry, the fish will still be extremely flavorful.

*Top each Salmon filet with the pats of butter and 2 lemon slices. Finish with fresh cracked black pepper and a sprinkle of salt. Bake 400 degrees for 5-10 minutes (depending on size, if thick cook longer!), then turn the temperature to 275 degrees and bake an additional 8-12 minutes. Check the center of the fish with a knife, when the meat of the fish is a medium shade of pink (no longer red, but not dry or whitish-pink) and slightly flaky, it is done. 

To Serve: Serve immediately, hot and sizzling out of the oven over rice, aside a fresh Feta & Cranberry Salad.

Feta & Cranberry Salad with a Balsamic Vinaigrette 
  • 2 cups Arugula Leaves
  • 1/2 cup Grape Tomatoes, sliced
  • 1/2 Cucumber, diced 
  • 1 Avocado, peeled, pitted, sliced
  • 1/3 cup Vidallia Onion, diced
  • 1/4 cup toasted Almond Slices
  • 1/4 cup dried Cranberries, or Craisins
  • 1/4 cup Feta, crumbled
*Put the arugula into a large bowl and toss with all ingredients. Add the Feta last, sprinkling it on top. 

Dressing:
  • 1/2 cup Balsamic Vinegar
  • 1/4 cup Extra-Virgin Olive Oil 
  • 1 Tbsp Cane Sugar
  • 1 Tbsp Whole-Grain Dijon Mustard 
  • 1/2 tsp Garlic Powder
  • 1/2 tsp Italian Seasoning
  • 1/4 tsp Cayenne
  • 2 cloves Garlic, pressed
  • 1/2 tsp Sea Salt
  • 1 tsp Cracked Black Pepper
*Combine all ingredients, and shake or whisk until well blended. Toss with the salad. 

This is my go-to salad and pairs well with most anything. I'll switch it up for different dishes with candied walnuts or trade the feta for goat cheese and add a lemon vinaigrette for a nice twist. 

This salmon dish pairs well with a light wine such as an Argentinean Pinot Noir or a Beaujolais. Try a 2007 Saurus Pinot Noir from Patagonia Argentina or for a less pricey option pick a 2008 Valle Perdido Pinot Noir, for only $11.99. While most believe Chardonnay is the typical pick for fish, I find the flavors baked in this salmon tend to be too strong for most whites; so stick with a light red or deep pink, and if you must go white try a Sauvignon Blanc or a Riesling. The 2004 Felton Road Riesling from Germany is only $10 and has a nice finish with flavors of mandarin and lemon.

Enjoy :] 

<3 Marea

9.13.2010

Mahi-Mahi Burgers with a Cilantro-Ginger Aioli & Sauteéd Pineapple Wedges

I know, I know, burgers are not typically the image that comes to mind when one thinks about fish- and vice versa. But after you try out this next recipe, all those mental prototypes of buns and red meat is drastically going to make a change for the better!

When I saw the sale on Mahi-Mahi the other day I was determined to make something fun and different. I prepared the burgers the night before, refrigerating them overnight, and using the down time to play with ideas of how to top them. I knew I wanted to use ginger and pineapple and was almost considering caramelized onions when my mother suggested I make an aioli. I was instantly smitten.

The results? I even surprised myself with how much I enjoyed this meal. It was uniquely refreshing, light, yet deliciously filling. My boyfriend took one bite and after he was done "mmming" and licking his lips he said, "Can we make this meal a regular thing?" He then proceeded to devour his entire plate, all the while telling me how I needed to make these burgers again and again, and soon!

Mahi-Mahi is a very mild white hawaiian fish and as long as you buy it very fresh (it should never ever smell fishy!) even an Anti-Fish-Eater would enjoy this meal. We've all seen frozen fish filets in the freezer section of the local grocery store, and while there are some quick fix brands that will work with this recipe, I challenge you to find the freshest fish you can and go all the way, making your own delicious homemade Mahi-Mahi Burgers from scratch.

Mahi-Mahi Burgers

  • 1 lb Mahi-Mahi Filets
  • 1 tsp Paprika
  • 1/4 cup Parsley, minced
  • 1/2 tsp Rosemary, dried
  • 1/4 tsp Sea Salt
  • 1/4 tsp Cracked Black Pepper
  • 1/2 tsp Garlic Powder
  • 1 egg or approximately 1/4 cup Sunflower Oil
  • Ginger, freshly grated
  • 2 Tbsp Coconut Oil
*Finely dice, or "mince" in a food processor, the Mahi and parsley. Add the rosemary, salt, garlic powder, and pepper. If using an egg, pre-whisk it in a separate bowl and then add to the Mahi mixture. If using the oil slowly drizzle into the mixture, kneading with your hands until the mix is moist and slightly sticky. Split into palm-sized portions, roll into balls, and then flatten, shaping the Mahi mixture into thin, rounded patties. Refrigerate for 3 hours or overnight. You can also freeze them if you'd like. 


*To Cook: In a frying pan heat the coconut oil over Medium-High. Sprinkle each side of the patties with a little sea salt and place in the pan. Increase the heat to High and grate about a tsp of fresh ginger onto the top of the Mahi Burger. Cook 3-5 minutes on each side depending on thickness. When you flip them, repeat with the ginger on the opposite side. Remove and cover to keep warm. Return the pan to the stove, reserving the juices, in which you will cook the pineapple. 


*Lightly toast the Ciabatta rolls in the oven while preparing the burgers and pineapple.


Sauteéd Pineapple Wedges

  • 1 cup Fresh Pineapple, cut into wedges
  • 1 tsp Cayenne Pepper
  • 1/2 Tbsp Coconut Oil (if needed)
  • 1 Tbsp Ginger
*In the same pan you cooked the burgers in, turn the heat back to High and add 1/2 Tbsp. of Coconut Oil (unless there is already enough "juice" left over from the burgers). Heat until very hot, test by flinging some water from your fingertips into the pan, if it sizzles or pops, the pan is hot enough. Add the pineapple, shaking the pan to toss them in the oil. Add the cayenne and the ginger. Continue shaking the pan, making the pineapples "jump!" which is a *key trick to sautéing. Cook for 2 minutes and then remove from heat. 


*Sauté actually means "Jump" in French and if your pan is hot enough it should make the food 'pop' naturally. It is best to heat the pan without oil first, testing it with water droplets before adding any oil or butter. Also, in Sautéing do not use a non-stick pan and use a pan-flip instead of a spatula as this turns the food at equal times and promotes even cooking. 


Cilantro-Ginger Aioli

  • 1/2 cup Mayonnaise (Use Veganaise for a healthy, similar taste)
  • Juice from 1/2 Lemon
  • 1/2-1 tsp Cayenne Pepper (depending on your heat preference!)
  • 3 cloves Garlic, pressed
  • 1/4 cup Cilantro, finely chopped
  • 1/4 tsp Seasoned Salt
  • 1 Tbsp Ginger, grated
  • 1/2 tsp Garlic Powder
*Combine all ingredients, reserving a small amount of the cilantro as garnish. Salt to taste. 


To Serve: Slice:

    • Red Onions
    • Avocados
    • Hot House Tomatoes
*Slather the toasted buns with the aioli, top with the onion slices, tomatoes, and 3 large ripe avocado slices! Sprinkle with Cilantro and serve with the Pineapple Wedges.


I also made some Teriyaki-Glazed Chicken Wings to serve as an appetizer but these burgers would go great with a batch of baked Sweet Potato Fries or Grilled Asparagus. 


This was a fast favorite in my household, and I now I hope it will find a happy home in yours as well! Happy Cooking!


<3 Marea

8.24.2010

Spicy Tuna Roll, Ginger Crab Roll, & Seared Ahi

What better way to begin this blog than with my latest recipe for my *favorite* most requested feast! After years of being an avid sushi seeker and spending far too many paychecks on this particular cuisine, I decided it was time; time to test my hand at my most favorite food. The results were life-changing.

I'm not kidding. 

A decent sushi dinner for two will usually run you at least $30, assuming you don't indulge in any sake bombs or appetizers, and not including the tip-- With smart shopping and a little kitchen magic I've managed to make a sushi spread for eight at less than $10 a person. Come on sushi fans, tell me that isn't life-changing!? At least your bank account will agree. The initial gathering of ingredients is slightly on the more expensive side, but once you've stocked your kitchen with the staples, you will be able to serve up several sushi dinners in style and only dish out for the cost of fresh fish. 

If you haven't visited an Asian Speciality Store- find one! This is key to keeping your costs low. Supermarkets, like Safeway, do include an Asian aisle but they will mark up the price of Nori, Wasabi, Rice, etc. almost triple what you will pay if you go straight to the source. So make best friends with the owner of your local Asian Market and prepare to satisfy those sushi cravings!

Buying FRESH fish is absolutely key. Don't waste your money buying previously frozen fish for sushi, it will never be as delicious! For Ahi, if it is a dull or bright pink, it was probably previously frozen. Ahi should be a deep red and never smell fishy! Costco is amazing for buying fresh seafood, in bulk, at affordable prices. I purchase all my Ahi for the Spicy Tuna Roll and The Seared Ahi from there in 2-3lb packages ranging about $12-$16. 

When I moved away from my hometown, I searched New York and then California for the perfect Spicy Tuna or Salmon Roll; alas nothing ever came close to my all-time favorite Spicy Salmon Roll from David's Kampai in Tucson, Arizona. I have modeled my Spicy Tuna roll after his, allowing my taste buds to re-imagine his masterpiece. 
Spicy Tuna Roll
  • 2 large Ahi Tuna Steaks 
  • 1-3 Tbsp Sriracha (depending on your spice preference)
  • 2 Tbsp Best Foods Mayonnaise (Any substitutes severely change the taste)
  • 1/4 tsp sea salt, or seasoned salt if you like
  • 1 cup Koshikari Sushi Rice ( I like the "Rice Select" brand)
  • 1 Tbsp Seasoned Rice Wine Vinegar 
  • 3 sheets of Roasted Nori (Seaweed) 
  • 1/2 cucumber, skinned and julienned
*Begin by preparing your rice according to the specific directions for the brand. Be sure to wash the rice before. Typically, you will add the rice and 1 1/4 cup water directly to the pan and bring to a boil. Next, turn the burner to low and cover the rice, simmering for 20 minutes. Remove from stove and allow to sit, covered, for 10 minutes. Next, transfer the rice to a large bowl and stir in the rice wine vinegar. Let cool. (If you are making both the ahi and the crab rolls be sure to double the amount of rice you make!!)


*Brunoise the Ahi, aka dice it into approximately 1/8 square pieces. Of course, it does not have to be exact but for the mental image aim small! Toss the Ahi in a medium bowl with the mayonnaise and the salt. Add the Sriracha, being sure to check the heat to your taste preferences. I don't like to mess around, when I mean spicy, I mean spicy! I will typically add 3+ Tbsp to mine. At this point you can cover and set the Ahi aside (keep cold!) if you plan to make the Ginger Crab Roll as well. 

The Ginger Crab Roll was inspired by a Top Chef episode I'd seen a few years back; I recalled seeing an episode where one of the contestants combined ginger and scallions to make a sushi roll and my mouth instantly watered. Here's my attempt at something similar. 
Ginger Crab Roll
  • 1 cup Super Lump White Real Crabmeat (Again, I love Costco for this: 16oz Chicken of the Sea Brand for $13.99, you'll get several meals out of this!)
  • 1 1/2 Tbsp Best Foods Mayonnaise 
  • 1 tsp Garlic powder
  • 3 Tbsp peeled grated Ginger
  • 1 tsp Ginger Powder
  • 1/4 tsp Sea Salt
  • 1/2 tsp Cracked Black Pepper
  • 1 bunch of diced fresh Scallions (3 Tbsp divided out for the crab roll)
  • 1 cup Koshikari Sushi Rice
  • 3 sheets of Roasted Nori 
  • 1/2 avocado, peeled and julienned
  • Sesame Seeds
*Combine the crab, mayonnaise, garlic powder, fresh and powdered ginger, salt, and pepper, in a medium sized bowl. Stir in 3 Tbsp of the diced scallions. Sprinkle in a generous amount of sesame seeds and Wah-lah! We are now ready to roll them up! 
Making the Rolls
*When everything is prepped and your rice has cooled you are now ready to make the rolls. Be sure to give yourself a large, flat, clean surface in which to work your magic. Fill a glass or small bowl with warm water to seal the sushi and set a clean towel within arms reach for your fingers. Most Sushi Chefs use a sushi mat but since I didn't have one when I first began this venture I became quite accustomed to "free rolling". 
  • Lay your Nori out flat, crease side down. Take a spoonful of rice and pat it into the Nori, repeating until you have made a thin flat layer of rice, leaving about an inch of Nori free on all sides. Sprinkle the rice with the Sesame Seeds. 
  • At the edge of the rice closest to you, lay a thin layer of the filling (tuna mix or crab mix), in a horizontal line to yourself. I use about 2-3 Tbsp of filling per roll, less for the Spicy Tuna as I reserve the majority of it for the topping. 
  • Add the avocado or cucumber slices, laying them in a thin line parallel to the filling. The cucumber and the avocado slices will extend past the edge of the nori on both the right and left sides. 
  • Now the fun part!! Gently pick up the edges of the nori, and roll them in and away from you, slowly tucking the edge closest to you under, as you would a sleeping bag. As you roll and tuck, moisten the nori by dipping your fingers in the water and running them along each edge. As you near the end, make the final seal with water across the end crease. Roll your hands over the roll, back and forth as you would a rolling pin. You can do this several times to secure the roll. This will become easier with practice but if you've ever seen sushi made before you'll pick it up quickly.
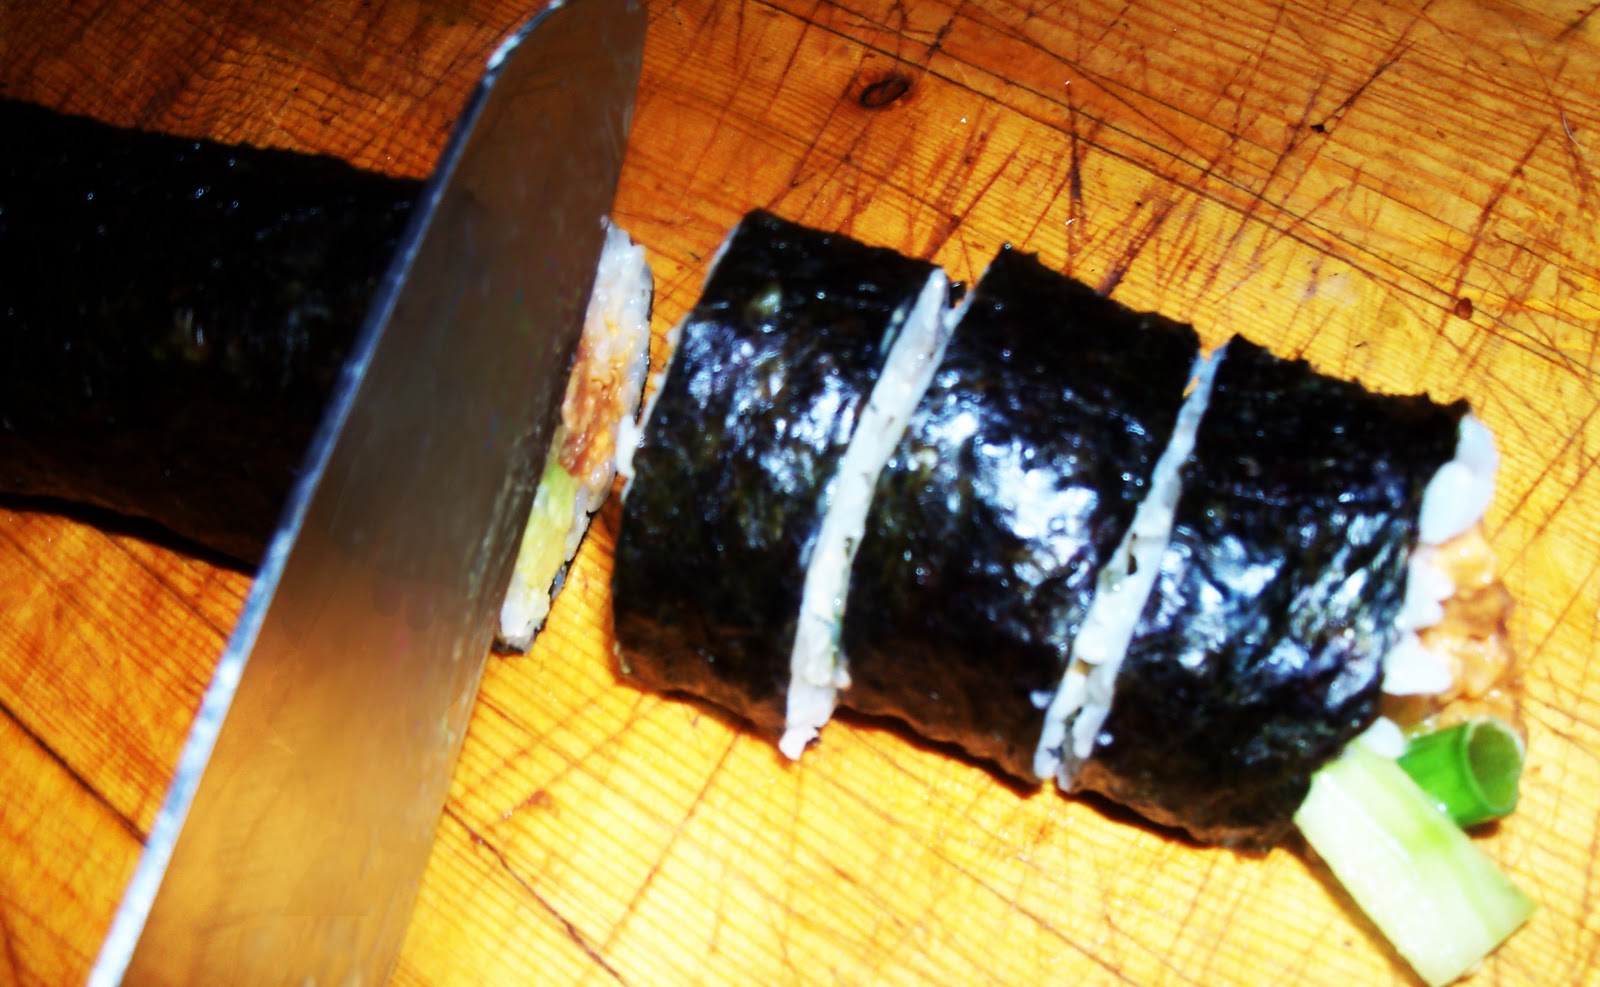
  • To cut the sushi you will need an extra sharp knife. Run the blade under hot water before cutting. I find it helps to clean it after several cuts, as the rice will begin to stick and disrupt your slices. I cut all my rolls at once as I am ready to plate them. I also like to top off the "end rolls" with extra filling.
*Each recipe makes three rolls, six in total. 

    I was taught to perfectly sear ahi by Kristian, a very close family friend. I've since created my own version playing off of the ginger and the sriracha used to make my sushi rolls. It is the pairing of these flavors which makes this seared ahi recipe a staple companion to my sushi feasts. 
    Seared Ahi with a Ginger Honey Ponzu Sauce
    • 1 large Ahi Steak 
    • 1 Tbsp Siriacha
    • 2 Tbsp Peanut Oil (divided)
    • 1/2 tsp Johnny's Garlic Seasoning 
    • Salt and Pepper to sprinkle
    • Sesame Seeds
    • Arugula or Red Cabbage
    Ginger Honey Ponzu Sauce
    Combine:
    • 2 Tbsp Sesame oil
    • 2 Tbsp honey
    • 4Tbsp Soy Sauce
    • 1 1/2 Tbsp Rice Wine Vinegar
    • 2 tsp ginger powder, or ginger juice
    • 1 tsp Sesame Seeds
    *In a Cast Iron pan heat 1 Tbsp of peanut oil on high until the oil smokes. Meanwhile, pat down one side of the ahi steak with 1 Tbsp of Sriracha, and then cover that surface with sesame seeds by patting them firmly into the tuna. Sprinkle with salt and pepper.

    *Place the fish sesame-side down into the pan. Immediately cover the exposed side with the remaining Tbsp of Peanut Oil and the garlic seasoning. Again, cover the entire side with a thick layer of sesame seeds. 

    *Cook the ahi about 30 seconds to 1 minute depending on the thickness. You will know to turn it when a very thin layer of the bottom has begun to turn white. Flip and cook for 30 more seconds on the other side. 

    *Remove instantly from the pan. The key to seared ahi is that the center must stay uncooked. You will be surprised how quickly this fish will overcook so be sure that the side view boasts a nice pink center! Using a very sharp knife, slice the ahi into thin strips and serve over a bed of arugula or chopped red cabbage with the ponzu sauce. 
    Serving the Sushi
    • Wasabi
    • Soy Sauce
    • Pickled Ginger
    • Sesame Seeds
    • The remaining diced Scallions
    *I serve my Spicy Tuna Roll with a generous topping of the Ahi filling. After the rolls are cut and plated, top the Spicy Tuna with approximately 1 Tbsp of the Ahi mixture. If you have extra Crab mixture you can top these rolls as well.

    *Sprinkle the rolls with sesame seeds and the remaining diced scallions. Serve with the wasabi, soy sauce, and ginger. Perhaps pair with some miso or edamame tossed in sea salt! 

    And there you have it, a homemade sushi extravaganza! Which will soon expand as I am experimenting with creating a new roll using mango and kiwis, and a Shrimp Tempura Roll is next on my list! So stay tuned and stay satisfied!

    <3 Marea
    Related Posts Plugin for WordPress, Blogger...