Enjoy! Because life is too short to deprive the palate!
Showing posts with label Spicy. Show all posts

10.21.2010

Grouse & Feta Salad, Asian-Style Duck over Warmed Cabbage, & The MPLS Taste Event

I recently had the pleasure of spending several wonderful days on vacation, visiting my best friend. Not only did I get to cook grouse for the first time (think chicken meets quail and you'll find the taste of grouse somewhere in the middle) but I was also able to attend The Minneapolis Taste Event, the twin cities ultimate Wine and Dine Experience.

This event boasted over 300 exclusive wines and 40 of Minneapolis' top chefs, as well as wine seminars, grilling stages, and several culinary demonstrations. The VIP Lounge was complete with crab cakes and chocolate fountains, as well as an especially unique pairing of gelatin shots, made with elderflower and ginger, that broke open when you bit into them, oozing a sweet alcoholic syrup that enveloped the taste buds. It was quite interesting to see so many of my local Northern California Vineyards mingling with blends from America's Dairyland and the Twin Cities. I definitely recommend attending if ever you have the chance!

On my last night in Wisconsin, Tayler and I celebrated by cooking up a homemade feast, tapas style, with steamed mussels, a grouse and feta salad, fresh bruschetta (recipe coming soon!), and asian-style duck served over warmed cabbage leaves. We toasted with lemon drop martinis and ended the evening with dessert drinks and homemade Honey Goat-Cheese Mini Cheesecakes (recipe coming soon!). An oddly paired myriad of flavors but a definite fun experience for the palate, and a great way to end a fabulous getaway.

Grouse & Feta Salad
  • 1 Breast of Grouse, skinned
  • 2 cups Fresh Arugula & Spring Mix Lettuce
  • 2 Tbsp. Olive Tapenade: blend: 2 oz sun-dried tomatoes (packed in oil) with 1/2 cup black olives, 1 tbsp. fresh basil, 1/2 cup capers, 1/2 tsp parmesan cheese, and 1 garlic clove. Add Pepper to taste.
  • Juice from 1-2 Lemon Wedges
  • 1 tsp Garlic Powder
  • 1 Tbsp. Extra Virgin Olive Oil
  • 2 cloves Garlic, minced
  • 1/4 cup Fresh Cherry Tomatoes, chopped
  • 1/4 cup Feta Crumbles
  • Sea Salt and Fresh Cracked Black Pepper, to taste
*Marinate the grouse in sea salt, garlic powder, and freshly cracked black pepper for 30 minutes. In a frying pan, heat the olive oil over medium heat. Add the minced fresh garlic, shaking the pan vigorously to keep the garlic from burning, approximately 30 seconds. Turn the heat to high and add the grouse, searing 1-2 minutes on each side depending on thickness. Check center of breasts to ensure they are a light pink, and cooked through. Remove from heat. Slice into thin strips. 

*Lay out a bed of the arugula and lettuce mix on a serving plate. Toss with 1 tbsp of the tapenade. Add the grouse and spread the remaining tbsp of tapenade across the meat. Sprinkle the cherry tomatoes and feta across the top. Squeeze the lemon wedges over the salad and salt and pepper to taste. Serve immediately. 

Asian-Style Duck over Warmed Cabbage Leaves
  • 2 Duck Breasts, skinned, bone-in
    • Sauce: 4 Tbsp Soy Sauce, 2 Tbsp Honey, 2 Tbsp Sesame Oil, 3 garlic cloves pressed, 2 tsp Bragg's Amino Acids, 1/2 tsp Red Pepper Flakes, 1/2 tsp garlic powder, 1 Tbsp White Wine Vinegar, 1 tsp Ginger Powder,  Sea Salt, and Pepper to taste.
      • Separate sauce into two portions. Marinate the duck breasts in half of the mixture, and reserve the rest for topping.
  • 1/2 head of Cabbage, cut and cored
  • 1/2 cup Low-Sodium Chicken Broth
  • 1/2 tsp Salt
  • 1/2 tsp Sugar
  • 1 Tbsp Unsalted Butter
  • 1/4 cup diced Vidalia Onion
  • 2 cloves Garlic, minced
  • 2 Tbsp Coconut Oil
*Lightly salt and pepper the duck breasts on all sides. In a large bowl marinate the duck breasts in half of the sauce for at least 30 minutes but up to 3 hours. Prep the cabbage and combine the chicken broth, salt, sugar, and butter in a large saucepan or steamer. If using a saucepan, add the cabbage and bring to a hard boil. Immediately reduce to a simmer and allow to cook until cabbage is tender, but still firm, approximately 6-12 minutes. Strain and set aside. 

*In a frying pan, heat the coconut oil over high heat until sizzling. Stir in the onions and let sweat for 1 minute, shaking the pan consistently. Add the minced garlic and the duck. Sear  each side quickly on high heat. Reduce to medium-low, add any extra sauce from the bowl the duck was previously marinating in, plus 1 cup of water, cover and let cook for 2 minutes. Remove cover, check centers, and fry over medium until cooked to your taste, 3-7 minutes. Remove from heat, debone, and slice in thin strips.

*Place the warmed cabbage onto your serving plate and sprinkle with salt and pepper, to taste. Layer the strips of duck meat across the cabbage and drizzle the reserved sauce over the top. Finish with a sprinkling of red pepper flakes and serve immediately. 

Both these dishes are excellent on their own but would pair well with other like-flavored dishes as well. I suggest the grouse salad as a companion to a hearty soup or sandwiches on fresh baked bread. It is also ideal as a dinner party starter. The Duck would pair excellently with other honey-glazed steamed root vegetables and can be made with the skin-on for a richer, more filling meal. 

For the recipes to our Lemon Drop Martinis, and Dessert Drinks Click Here!

Enjoy!

<3 Marea


9.29.2010

New Orleans Style "Shrimp" Creole with Fresh Black Tiger Prawns

I was recently given a request to recreate a family recipe that had over the years gone missing. My mission: Shrimp Creole. Now, authentic New Orleans cuisine isn't exactly my strong point but I am always eager for a challenge and I had a flavor palate in mind that I imagined would work well for such a dish. This dish requires quite a bit of prep work and attention to detail, but the results are more than worth the effort.

After several various tweaks I now have success at my fingertips. This dish is eloquently spicy; the heat is sweetly masked in the rich, savory gravy created by the melding of the fresh vine-ripened tomatoes and the homemade shrimp stock. My test palates confirmed that it was, "delicate yet hearty", with "just the right amount of spice", and "sat perfectly" "delicious to the last bite." I know it isn't good form to "mmm" over your own food, but I literally could not help myself! Shrimp Creole just made its way into my taste buds' heart and is a guaranteed gastronomic tour de force!

I have elected to use prawns, which bear a great resemblance to shrimp, so much so that many restaurants and grocery stores use them interchangeably, although the two have various differences on the biological level. The popular census is that prawns are larger (bonus), but I personally just find them more appetizing. Oh, and Costco sells them 1.5lbs for $13. Can't say no that!

Two most important factors I found is that: 1.) It is imperative to make your own homemade stock. Sure canned stock saves time but it will never be as flavorful and the added salt will bastardize your entire sauce. Besides, unlike other stocks, shrimp stock only takes an hour to cook and you can always prep ahead of time and freeze. And, 2.) Make your own Creole Seasoning. White pepper is a leading flavor component in this meal and most store-bought blends don't give it the limelight it deserves. My sauce had a completely different taste using a pre-made spice. So if you want to give your senses the full experience, don't skip these steps!

Shrimp Creole
  • 11/2 lbs  Black Tiger Prawns 
  • 2 Tbsp Butter, unsalted
  • 1 Tbsp Olive Oil
  • 2 Tbsp All-Purpose Flour
  • 1 large Vidalia Onion, diced
  • 2 Celery Stalks, diced
  • 1 large Green Bell Pepper, diced
  • 4 Tbsp Diced Canned Tomatoes


  • 2 1/2 cups fresh Campari Tomatoes
  • 2 Tbsp Creole Seasoning
    • Combine:
      • 1/4 cup Kosher Salt
      • 2 Tbsp Paprika
      • 1/4 cup Garlic Powder
      • 1 1/2 Tbsp White Pepper
      • 1 Tbsp Cayenne
      • 2 Tbsp Onion Granules
      • 2 Tbsp Black Pepper
      • 3 Tbsp Italian Seasoning
      • 1 Tbsp Sugar
    • Makes 5 oz. I recycle empty spice bottles and relabel. Great to have on hand!
  • 1/2 cup Dry White Wine
  • 2 cups Homemade Shrimp Stock (*Recipe Here*)
  • 2 Garlic Cloves, minced
  • 2 fresh Bay Leaves
  • 1 tsp Cayenne, Sea Salt, and White Pepper
  • 1 bunch of fresh Thyme Sprigs
  • 1 Tbsp Corn Starch dissolved in 2 Tbsp warm water
  • 1 Tbsp Worcestershire Sauce
  • 2 Tbsp Louisiana Hot Sauce
  • 1/2 bunch of Green Onions, chopped
  • Fresh Flat Leaf Parsley, for garnish

*Begin by making your homemade stock and creole seasoning. Set aside.
*In a large a sauté pan melt the butter and oil over medium-high heat. Whisk in the flour, 1 Tbsp at a time, to form a blond roux. Next, add the onion, 1/2 cup at a time, mixing well. Reduce the heat to medium and add the celery, green pepper, a pinch of salt, and 1 Tbsp of the Creole Seasoning. Stir well and allow the vegetables to sweat in the spices. 

*Next add the canned and fresh tomatoes. Sprinkle in another pinch of salt to encourage the tomatoes to release their juices. Once the tomatoes break down pour in the white wine and increase the heat to high. 
*As the sauce begins to bubble, add the shrimp stock and the second Tbsp of Creole Seasoning. Stir in the garlic, bay leaves, and thyme and bring to a boil. Reduce heat and let simmer for 35-40 minutes.


*Next, dissolve the corn starch in 2 Tbsp of warm water and turn up the heat on your sauce. Mix in the starch as the sauce begins to boil. This will cause your sauce to thicken to a gravy-esque consistency. Season to taste with salt and white pepper.
*Let bubble while you prep the prawns. 


*Toss prawns with cayenne, salt, and white pepper. Add them to your boiling sauce and reduce heat to low. It is very easy to overcook prawns and shrimp, so keep a close eye on them, turning off the heat as soon as they have all turned a light shade of pink. Stir in the green onions. 


To Serve: Forgoing the traditional Creole boiled jasmine rice, I chose to instead serve this dish over a germinated brown rice. The hearty texture compliments the complex flavors of the Creole Sauce, activating dormant enzymes, which boosts health benefits and enhances tastes. Whichever type of rice you choose steam it with 2 bay leaves, a tsp of salt, and 1 Tbsp of butter per cup of rice. 

*Also pair with a hearty french bread to sop up the gravy. I love the fresh baked artisan loafs from Costco.

I've never been to New Orleans (Nola Town in Disneyland doesn't quite count right?) and I don't claim to be an expert in their traditional cuisine- but this dish is DELICIOUS. I supplemented my personal knowledge and taste preferences with plenty of research to create an as close to authentic dish with some tasteful twists! This Shrimp Creole is sure to pacify the palate and send you back for seconds!

Enjoy :]

<3Marea

9.01.2010

Steak Tacos, Habanero & Mango Salsas, & Strawberry Mint Margaritas!


After living on both coasts I can now say with full confidence that Tucson, AZ has *THE* very best Mexican food I have yet to come across in the U.S. Before anyone gets defensive, New York and California do dish up some delicious Latin-flavored feasts, but when it comes to authentic, "As-Close-to-Actually-Dining-in-Mexico-Style" cuisine on a consistent level, Southern Arizona is the whole enchilada! Hey, they have to have something good there to ease the pain of 108 degree summer days, right? :] Oh, and did I mention, not only does Tucson have the best Mexican food, they also like to serve it up 24 hours a day, no matter the holiday? Now there's a reason to endure the heat!

Since the move I've had to do my best to bring the taste of the Southwest to our table, and although the following recipes may not beat the real thing, they are still pretty damn delish! 

Warning! The following recipes are wickedly spicy! Use discretion, if you can't handle the heat add the peppers a little at a time.

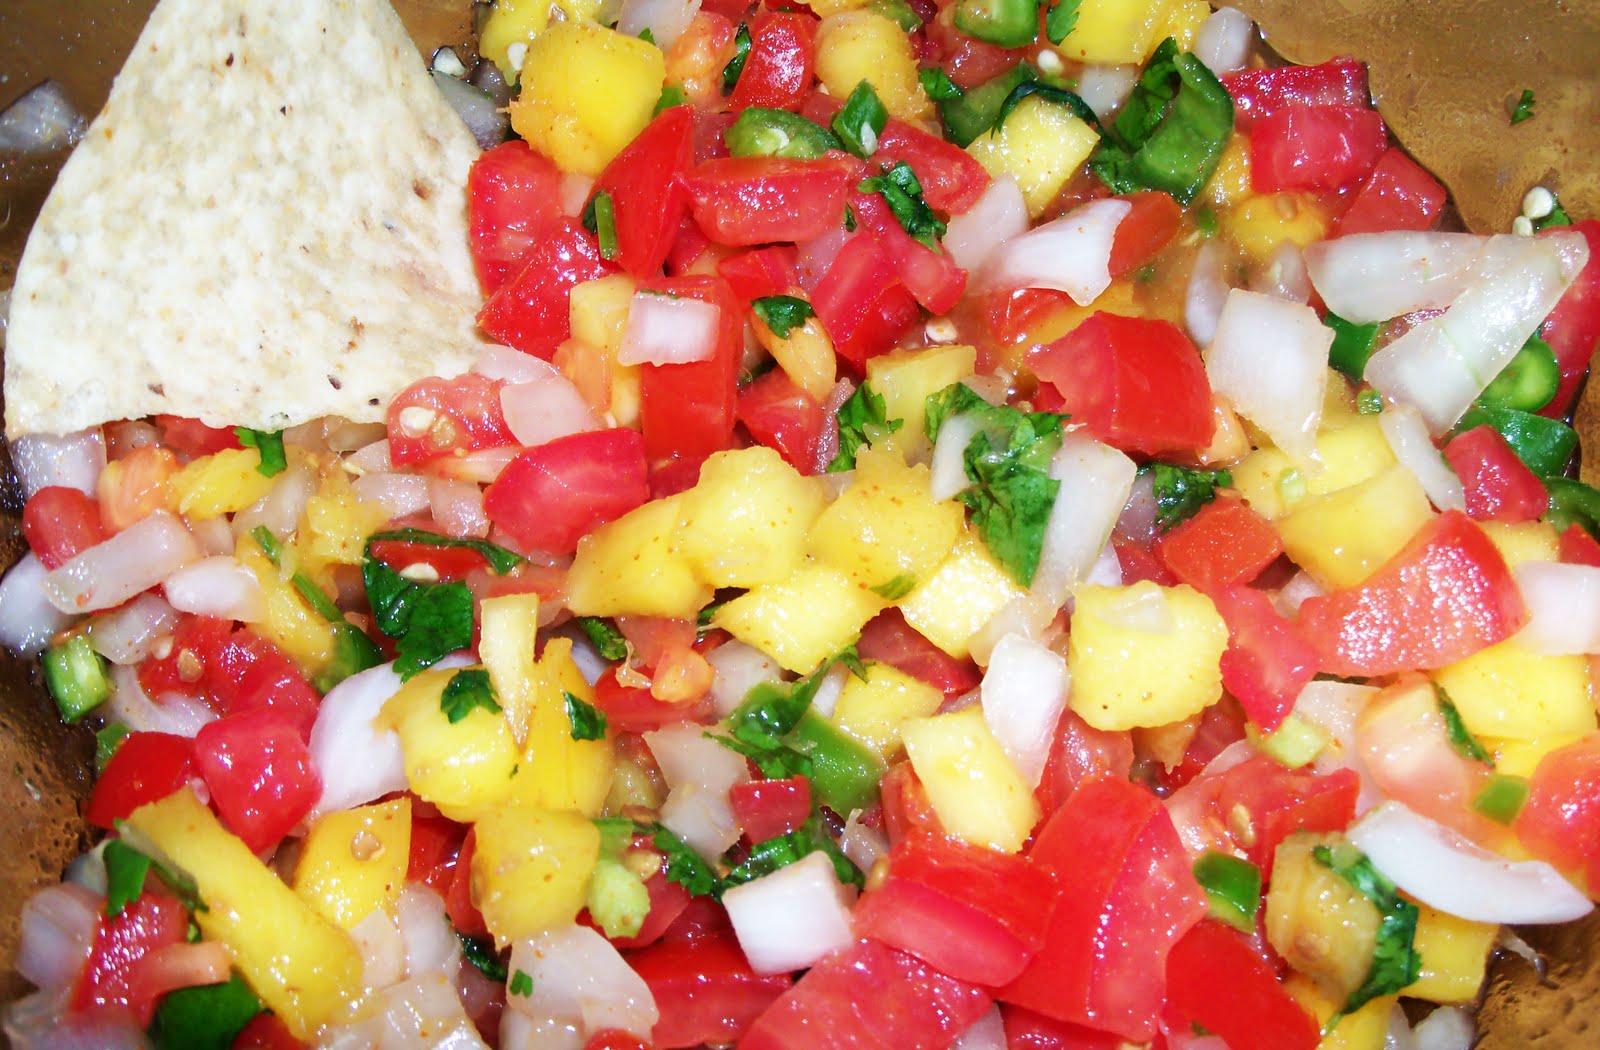
Fresh Mango Pico de Gallo 
  • 4 Roma Tomatoes
  • 1/2 cup Cherry Tomatoes
  • 1 medium Sweet Onion
  • 1 red Guajillo Pepper (look like red jalapeno)
  • 2 Hot Cherry Peppers
  • 1 Yellow Hot Wax Pepper
  • 1 green Jalapeno
  • 1 cup Fresh Mango
  • 1/2 cup Cilantro, chopped
  • 1/2 Tbsp. Sugar
  • Juice from 2 Limes
  • 2 tsp. Pico de Gallo (the spice!)
  • Salt and Pepper, to taste
*Brunoise the tomatoes, onions, and peppers. Toss them with the sugar, lime juice, pico de gallo, salt and pepper. More salt will make the tomatoes and onions sweat, which will create a juicier salsa. Stir in the Cilantro. Refrigerate for at least 30 minutes. 

I love to make a Salsa Fresca for topping tacos, burritos, and even eggs but my boyfriend recently requested a more "thick and saucy" style dip for dunking his chips. A food processor, or "Ultimate Chopper" in my case, was the perfect fix for just such a request. 

Hot & Hearty Habanero Salsa
-In a Food Processor, mildly puree: 
  • 5 Mini Bell peppers, red, orange, yellow 
  • 1/2 of a large Onion
  • 3 Celery Stalks, halved
  • 1 Roma Tomato
  • 1 Hot House Tomato
  • 4 cloves of garlic
  • 2 orange Habaneros
  • 2 Serranos
  • 2 green Jalapenos
*Be sure to cut down into pieces your chopper can handle! You can blend these separately and then mix them together in a large bowl.

Next brunoise and add:
  • 4 Roma Tomatoes
  • The other half of the large Yellow Onion
  • 1 Orange Habanero Pepper
  • 1 green Jalapeno Pepper
  • 1 Serrano Pepper
  • 4 Mini Bell Peppers, red, orange, and yellow
Stir everything together and season with:
  • ½ cup Cilantro, chopped
  • 1 tsp Seasoned Salt
  • 1/2-1 tsp Himalayan Crystal Salt (or regular sea salt)
  • 1 tsp Black Pepper
  • 1 tsp Garlic Powder
  • Juice from 1 lime
  • 1/2 tsp Cayenne Pepper
  • 1 Tbsp. Cane Sugar
*Refrigerate before serving. 

If there is one trick I've learned from watching and indulging in my father's salsas my whole life is that, the best way to make hot salsa manageable is to trick the taste buds with sweetness. The mini bells add a nice sugary taste (as does the Tbsp. of sugar!) that allows the first bite of this salsa to be deliciously dulcet while the after taste sparks up the spice. The taste buds are able to temper between each bite, the sweet providing a much needed cushion before the heat sets in (and after, since you can't stop eating it!). 

Steak Tacos
  • 2 thinly cut Skirt or Flank Steaks, sliced into strips
  • 2 Tbsp. Olive Oil (or butter if you prefer)
  • 1 Jalapeno, diced
  • 1 clove Garlic, minced
  • 1 tsp. Cayenne Pepper
  • 1 tsp. Seasoned Salt
  • 1 tsp. Garlic Powder
  • 1/8 tsp. Lemon Pepper
  • 1/2 tsp. Chili Powder
  • 1/2 tsp. Cumin
  • Juice from 1/2 of a Lime
  • 1/4 cup Red Onion, thinly sliced
  • Pepper, to taste
  • 1/4 cup Cotija Cheese
  • 1/4 cup Cheddar Cheese
  • 1 Avocado, freshly sliced
  • Soft or Crunchy Corn Tortillas (I like soft, The Boyfriend likes crunchy, so I make both!)
*After you have sliced the steak, toss it with all of the spices in a medium size bowl. Squeeze the lime on top and let sit. In a skillet heat the oil over Medium-high. Add the onions and sauté for 3-5 minutes, until soft. Add the jalapeno and garlic and cook 1 additional minute. Toss in the marinated steak and turn the heat to High. Cook, stirring frequently, until the meat is no longer pink, approximately 1 minute. Salt and Pepper to taste. Reduce heat to low and cover, allowing the meat to simmer in its juices for 2 more minutes. Remove the steak from the heat and transfer to a bowl, cover. 
*Heat the tortillas over the burner, flipping every 10 seconds until heated through. 

To Serve: Pile the tortillas full with the steak, cheddar cheese, and Salsa. If you don't make a salsa fresca top the tacos with chopped tomatoes and onions and garnish with cilantro. Finish with the Avocado Slices and sprinkle the Cotija over the entire plate. 

I also enjoy pairing my Steak Tacos with some cheesy refried beans, guacamole and to make the event complete, a quick and easy twist on a Strawberry Margarita!

Strawberry Mint Margaritas
  • 2 oz Tequila (I'm not saying use Patron, but for the love of all things good and decent stay away from Jose Cuervo and Sauza!)
  • Sprite, or Lemon-Lime Soda
  • Agave Nectar
  • Splash of Orange Juice
  • Fresh Squeezed Lime
  • Freshly Sliced Strawberries
  • Mint Leaves
  • Martini Shaker
  • Glass of Ice
*In a martini shaker muddle 3-4 mint leaves with several strawberry slices. Add 1 oz (a standard US shot is 1.5 oz) of tequila and approximately 1/2 cup of Sprite and juice from 2-3 lime slices. In a glass filled with ice, pour the agave nectar down the sides of the glass, twirl to coat all sides. Shake the mixture in the martini shaker and pour over the ice in the glass. Add a splash of orange juice. Finish by floating the final oz of tequila on top; this is done by pouring the shot slowly through a lime slice. Garnish with said lime and a straw. 

Cheers! And Happy feasting!

<3 Marea 


8.27.2010

Chicken Tortilla Soup

When I was younger I remember going to a restaurant in downtown Tucson with my mother and having my first memorable bite of Chicken Tortilla Soup. There were thick juicy slices of fresh green avocados atop crunchy salty tortilla strips. The bowl was finished off with a generous blanket of deliciously gooey cheddar cheese. This was my inspiration when creating this recipe.

This soup was the first dish I ever made in my Crockpot- in fact it was the motivating factor behind my purchase of said Crockpot. I just had the feeling that this soup would be a perfect Crockpot cook. The ingredients are easy to find and cheap to stockpile and the results are simply mouth-watering! Enjoy :]

Chicken Tortilla Soup
  • 3 cups boneless skinless Chicken Breast, cubed
  • 2 cups whole kernel corn, thawed if frozen.
  • 2 medium yellow onions, chopped
  • 3 cloves garlic, minced
  • 3 Tbsp. fresh lime juice
  • 2 cans of Low Sodium Chicken Broth (14.5oz ea.)
  • 1 can Tomato Puree (10.5 oz)
  • 1 can Diced Tomatoes with Green Chiles (10 oz)
  • 1 tsp Kosher Salt
  • 3 tsp. Ground Cumin
  • 1-3 tsp Chili Powder (Adjust for your spice preference)
  • 1 tsp freshly cracked Black Pepper
  • 2 tsp Cayenne red pepper (or 1 to reduce the heat)
  • 2 Bay Leaves
TOPPING
  • 2+ cups Shredded Cheese (I use a Mexican or 3 Cheese Blend)
  • 1 cup Fresh Chopped Cilantro
  • 6 Soft Corn Tortillas
  • 2 Avocados, Sliced
  • Seasoning Salt 
* To prepare the soup combine all ingredients (minus those set aside for the topping) into your slow cooker. Cover and cook on low for 6 hours. I tend to check it after two and adjust the spice and salt to my liking. After 6 hours turn the pot to high and cook an additional 20-30 minutes. During this time preheat the oven to 375 degrees. Slice the corn tortillas into long thin strips. Place on tin-foil lined baking sheet and sprinkle with seasoned salt. Bake for 5 minutes and then turn and bake for an additional 3 minutes until crisp.

*Ladle the soup into bowls and top with the tortilla strips, avocado, and cheese. Add the cilantro as the final touch. 

I use these proportions in a 6 quart Crockpot and yield approximately 8 servings. Which makes this a perfect dish for a get together or one to ensure left-overs!

Happy Eating :]  

<3 Marea 

8.24.2010

Spicy Tuna Roll, Ginger Crab Roll, & Seared Ahi

What better way to begin this blog than with my latest recipe for my *favorite* most requested feast! After years of being an avid sushi seeker and spending far too many paychecks on this particular cuisine, I decided it was time; time to test my hand at my most favorite food. The results were life-changing.

I'm not kidding. 

A decent sushi dinner for two will usually run you at least $30, assuming you don't indulge in any sake bombs or appetizers, and not including the tip-- With smart shopping and a little kitchen magic I've managed to make a sushi spread for eight at less than $10 a person. Come on sushi fans, tell me that isn't life-changing!? At least your bank account will agree. The initial gathering of ingredients is slightly on the more expensive side, but once you've stocked your kitchen with the staples, you will be able to serve up several sushi dinners in style and only dish out for the cost of fresh fish. 

If you haven't visited an Asian Speciality Store- find one! This is key to keeping your costs low. Supermarkets, like Safeway, do include an Asian aisle but they will mark up the price of Nori, Wasabi, Rice, etc. almost triple what you will pay if you go straight to the source. So make best friends with the owner of your local Asian Market and prepare to satisfy those sushi cravings!

Buying FRESH fish is absolutely key. Don't waste your money buying previously frozen fish for sushi, it will never be as delicious! For Ahi, if it is a dull or bright pink, it was probably previously frozen. Ahi should be a deep red and never smell fishy! Costco is amazing for buying fresh seafood, in bulk, at affordable prices. I purchase all my Ahi for the Spicy Tuna Roll and The Seared Ahi from there in 2-3lb packages ranging about $12-$16. 

When I moved away from my hometown, I searched New York and then California for the perfect Spicy Tuna or Salmon Roll; alas nothing ever came close to my all-time favorite Spicy Salmon Roll from David's Kampai in Tucson, Arizona. I have modeled my Spicy Tuna roll after his, allowing my taste buds to re-imagine his masterpiece. 
Spicy Tuna Roll
  • 2 large Ahi Tuna Steaks 
  • 1-3 Tbsp Sriracha (depending on your spice preference)
  • 2 Tbsp Best Foods Mayonnaise (Any substitutes severely change the taste)
  • 1/4 tsp sea salt, or seasoned salt if you like
  • 1 cup Koshikari Sushi Rice ( I like the "Rice Select" brand)
  • 1 Tbsp Seasoned Rice Wine Vinegar 
  • 3 sheets of Roasted Nori (Seaweed) 
  • 1/2 cucumber, skinned and julienned
*Begin by preparing your rice according to the specific directions for the brand. Be sure to wash the rice before. Typically, you will add the rice and 1 1/4 cup water directly to the pan and bring to a boil. Next, turn the burner to low and cover the rice, simmering for 20 minutes. Remove from stove and allow to sit, covered, for 10 minutes. Next, transfer the rice to a large bowl and stir in the rice wine vinegar. Let cool. (If you are making both the ahi and the crab rolls be sure to double the amount of rice you make!!)


*Brunoise the Ahi, aka dice it into approximately 1/8 square pieces. Of course, it does not have to be exact but for the mental image aim small! Toss the Ahi in a medium bowl with the mayonnaise and the salt. Add the Sriracha, being sure to check the heat to your taste preferences. I don't like to mess around, when I mean spicy, I mean spicy! I will typically add 3+ Tbsp to mine. At this point you can cover and set the Ahi aside (keep cold!) if you plan to make the Ginger Crab Roll as well. 

The Ginger Crab Roll was inspired by a Top Chef episode I'd seen a few years back; I recalled seeing an episode where one of the contestants combined ginger and scallions to make a sushi roll and my mouth instantly watered. Here's my attempt at something similar
Ginger Crab Roll
  • 1 cup Super Lump White Real Crabmeat (Again, I love Costco for this: 16oz Chicken of the Sea Brand for $13.99, you'll get several meals out of this!)
  • 1 1/2 Tbsp Best Foods Mayonnaise 
  • 1 tsp Garlic powder
  • 3 Tbsp peeled grated Ginger
  • 1 tsp Ginger Powder
  • 1/4 tsp Sea Salt
  • 1/2 tsp Cracked Black Pepper
  • 1 bunch of diced fresh Scallions (3 Tbsp divided out for the crab roll)
  • 1 cup Koshikari Sushi Rice
  • 3 sheets of Roasted Nori 
  • 1/2 avocado, peeled and julienned
  • Sesame Seeds
*Combine the crab, mayonnaise, garlic powder, fresh and powdered ginger, salt, and pepper, in a medium sized bowl. Stir in 3 Tbsp of the diced scallions. Sprinkle in a generous amount of sesame seeds and Wah-lah! We are now ready to roll them up! 
Making the Rolls
*When everything is prepped and your rice has cooled you are now ready to make the rolls. Be sure to give yourself a large, flat, clean surface in which to work your magic. Fill a glass or small bowl with warm water to seal the sushi and set a clean towel within arms reach for your fingers. Most Sushi Chefs use a sushi mat but since I didn't have one when I first began this venture I became quite accustomed to "free rolling". 
  • Lay your Nori out flat, crease side down. Take a spoonful of rice and pat it into the Nori, repeating until you have made a thin flat layer of rice, leaving about an inch of Nori free on all sides. Sprinkle the rice with the Sesame Seeds. 
  • At the edge of the rice closest to you, lay a thin layer of the filling (tuna mix or crab mix), in a horizontal line to yourself. I use about 2-3 Tbsp of filling per roll, less for the Spicy Tuna as I reserve the majority of it for the topping. 
  • Add the avocado or cucumber slices, laying them in a thin line parallel to the filling. The cucumber and the avocado slices will extend past the edge of the nori on both the right and left sides. 
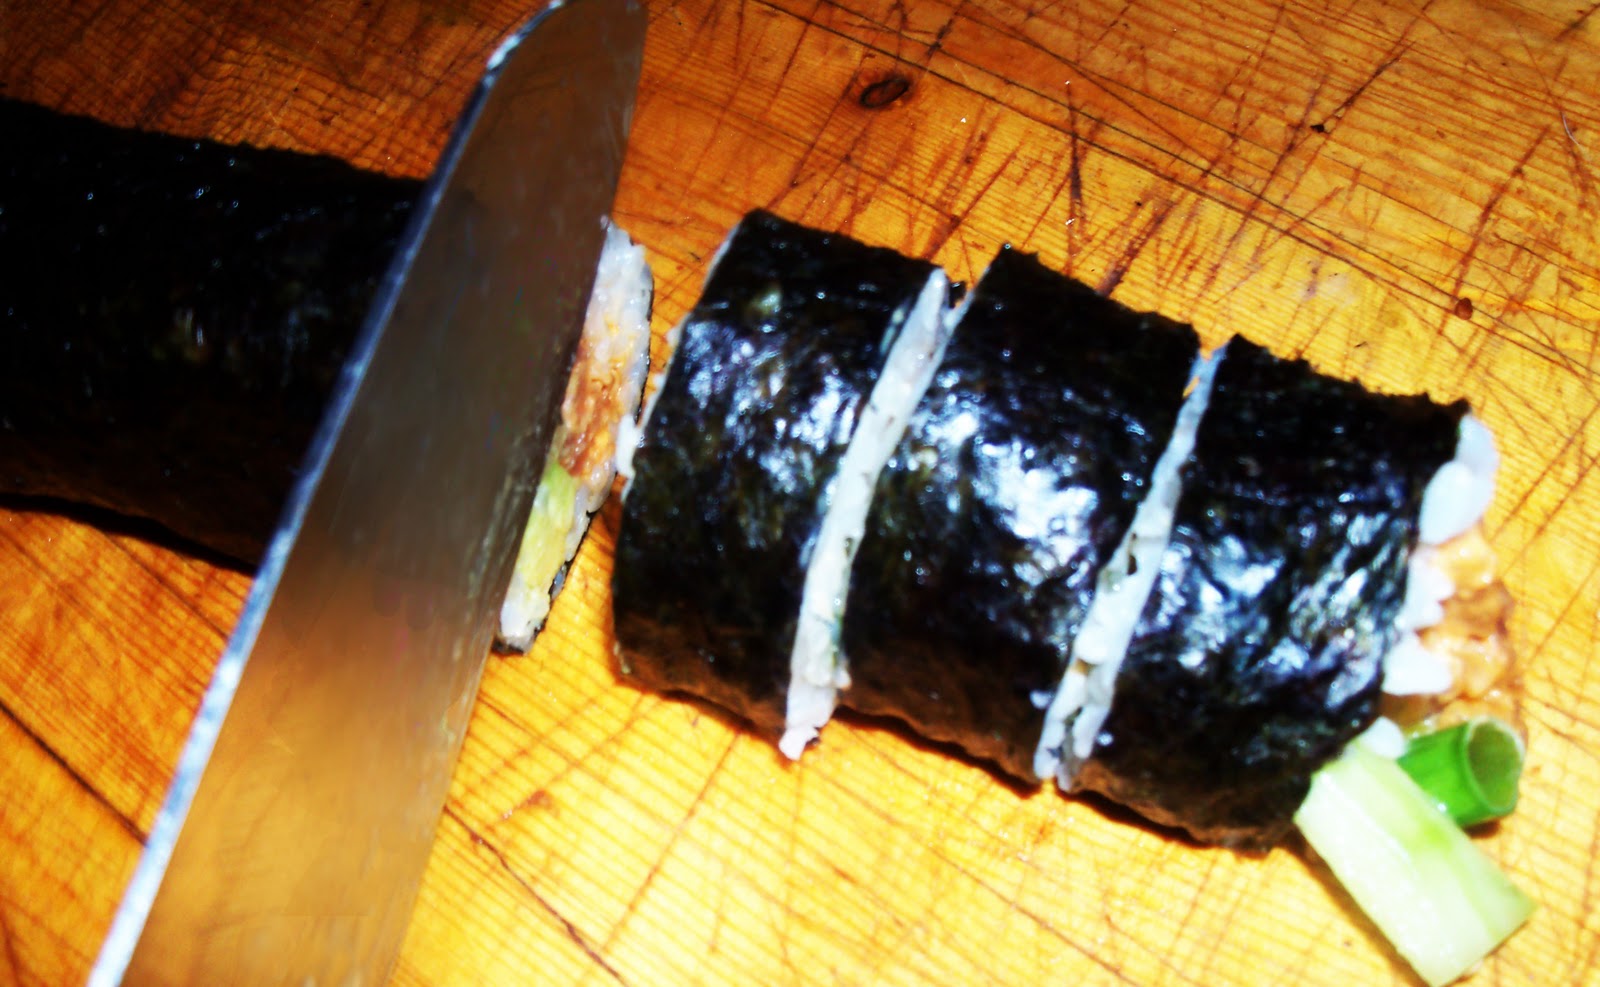
  • Now the fun part!! Gently pick up the edges of the nori, and roll them in and away from you, slowly tucking the edge closest to you under, as you would a sleeping bag. As you roll and tuck, moisten the nori by dipping your fingers in the water and running them along each edge. As you near the end, make the final seal with water across the end crease. Roll your hands over the roll, back and forth as you would a rolling pin. You can do this several times to secure the roll. This will become easier with practice but if you've ever seen sushi made before you'll pick it up quickly.
  • To cut the sushi you will need an extra sharp knife. Run the blade under hot water before cutting. I find it helps to clean it after several cuts, as the rice will begin to stick and disrupt your slices. I cut all my rolls at once as I am ready to plate them. I also like to top off the "end rolls" with extra filling.
*Each recipe makes three rolls, six in total. 

    I was taught to perfectly sear ahi by Kristian, a very close family friend. I've since created my own version playing off of the ginger and the sriracha used to make my sushi rolls. It is the pairing of these flavors which makes this seared ahi recipe a staple companion to my sushi feasts. 
    Seared Ahi with a Ginger Honey Ponzu Sauce
    • 1 large Ahi Steak 
    • 1 Tbsp Siriacha
    • 2 Tbsp Peanut Oil (divided)
    • 1/2 tsp Johnny's Garlic Seasoning 
    • Salt and Pepper to sprinkle
    • Sesame Seeds
    • Arugula or Red Cabbage
    Ginger Honey Ponzu Sauce
    Combine:
    • 2 Tbsp Sesame oil
    • 2 Tbsp honey
    • 4Tbsp Soy Sauce
    • 1 1/2 Tbsp Rice Wine Vinegar
    • 2 tsp ginger powder, or ginger juice
    • 1 tsp Sesame Seeds
    *In a Cast Iron pan heat 1 Tbsp of peanut oil on high until the oil smokes. Meanwhile, pat down one side of the ahi steak with 1 Tbsp of Sriracha, and then cover that surface with sesame seeds by patting them firmly into the tuna. Sprinkle with salt and pepper.

    *Place the fish sesame-side down into the pan. Immediately cover the exposed side with the remaining Tbsp of Peanut Oil and the garlic seasoning. Again, cover the entire side with a thick layer of sesame seeds. 

    *Cook the ahi about 30 seconds to 1 minute depending on the thickness. You will know to turn it when a very thin layer of the bottom has begun to turn white. Flip and cook for 30 more seconds on the other side. 

    *Remove instantly from the pan. The key to seared ahi is that the center must stay uncooked. You will be surprised how quickly this fish will overcook so be sure that the side view boasts a nice pink center! Using a very sharp knife, slice the ahi into thin strips and serve over a bed of arugula or chopped red cabbage with the ponzu sauce. 
    Serving the Sushi
    • Wasabi
    • Soy Sauce
    • Pickled Ginger
    • Sesame Seeds
    • The remaining diced Scallions
    *I serve my Spicy Tuna Roll with a generous topping of the Ahi filling. After the rolls are cut and plated, top the Spicy Tuna with approximately 1 Tbsp of the Ahi mixture. If you have extra Crab mixture you can top these rolls as well.

    *Sprinkle the rolls with sesame seeds and the remaining diced scallions. Serve with the wasabi, soy sauce, and ginger. Perhaps pair with some miso or edamame tossed in sea salt! 

    And there you have it, a homemade sushi extravaganza! Which will soon expand as I am experimenting with creating a new roll using mango and kiwis, and a Shrimp Tempura Roll is next on my list! So stay tuned and stay satisfied!

    <3 Marea
    Related Posts Plugin for WordPress, Blogger...